Jump to:
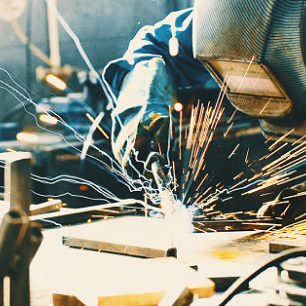
Welding Repairs Getting It Right the First Time
Welding repairs often involve higher stakes than original fabrication. The pressure is greater, the conditions are more challenging, and the consequences of failure are more severe. Once a critical weld is compromised, the risks increase significantly: What was critical becomes supercritical, the margin for error narrows, and the cost of failure multiplies. A failure in a newly fabricated pressure vessel might be inconvenient, but a failure in a repaired pressure vessel already in service could be catastrophic.
Repairs range widely from fixing cracks in machine frames under load to addressing defects caught during new construction. But what all successful repairs have in common is precision, preparation, and control. You’re not just welding; you’re restoring structural integrity, asset reliability, and, often, operational safety.
A practical, field-tested approach helps ensure weld repairs are done right the first time.
1. Diagnose Failure and Repair Type before Welding
Before you grind or light an arc, stop and assess the failure. Welding over a problem without diagnosing its cause guarantees future failure. A comprehensive diagnosis needs to consider the specific repair context.
In-service weld repairs are often complex because the materials have been exposed to fatigue, thermal cycling, corrosion, or mechanical overload. These conditions leave behind residual stress, structural changes, and, sometimes, hidden damage.
Conducting a detailed failure analysis is essential in critical applications to understand what broke and prevent it from happening again. This analysis informs everything from filler metal selection to procedure design.
Key diagnostic points include the following:
- Identifying the failure mechanism (e.g., fatigue, overload, corrosion)
- Inspecting adjacent material for cracks, hardening, or deformation
- Documenting environmental or operational factors contributing to failure
New weld defect repairs are typically caught on the spot through nondestructive examination (NDE) during fabrication. Because the base metal is usually still clean and undamaged, the goal is to eliminate the defect (whether it’s porosity, incomplete fusion, or inclusion) and prevent recurrence.
For both types of repairs, surface prep is nonnegotiable. Remove contaminants like oil, rust, or coatings and clean beyond the visible defect zone. If cracks are present, grind them out thoroughly. Repair welding begins with clean, sound metal.
2. Use the Right Welding Procedure Specification
A welding procedure specification (WPS) isn’t just a compliance document; it’s your roadmap for successful repairs. The original component may have been welded using a WPS optimized for production; however, repair welding often requires a dedicated WPS. It may call for a different process, like switching from submerged arc to gas tungsten arc welding due to access, heat control, or joint geometry.
Whenever possible, complete the following:
- Review the original WPS to understand process and material compatibility.
- Develop a new WPS if needed, especially for critical or regulated applications.
- Account for access limitations, like overhead welding or tight clearances.
A good repair WPS clearly defines the following:
- Preheat and interpass temperature
- Filler metal classification
- Travel speed and heat input limits
- Joint design and cleaning steps
Using a WPS ensures traceability, consistency, and compliance with engineering and code requirements.
3. Choose the Right Filler Metal
The filler metal must be compatible with the base material and the original weld. If the wrong filler is used, you risk poor fusion, mismatched properties, or cracking. Ideally, you can match the original filler if the WPS is available. If not, review the base metal certificate and select a filler that slightly overmatches the strength. If both the original filler metal and base metal are unknown, do a chemical analysis for the weld and/or base metal and select a filler metal based on that data.
And remember, overmatching doesn’t mean overkill; it means ensuring the weld won’t become the weak link under load or service stress.
4. Set the Right Welding Parameters
If a repair WPS exists, follow it exactly. If one doesn’t exist (for less critical applications), then define your parameters based on the following:
- Welding process and filler type
- Joint size and accessibility
- Required heat input and distortion control
- Application criticality (e.g., pressure retaining, load bearing)
Repairs are about precision, not speed. In these situations, you’re not chasing throughput but aiming for reliability. Your best allies are slower travel speeds, tighter arc control, and deliberate passes. Rushing leads to rework, and rework in repair welding is expensive, both in time and trust.
5. Leverage High-Quality Consumables, Especially for Gas Metal/Flux Cored Arc Welding Repairs
If you’re using gas metal or flux cored arc welding, your consumables are critical to weld quality. Poor liners, worn tips, or inconsistent wire delivery can turn a simple repair into a failure point.
In repair welding, the stakes are higher. A single burnback, spatter pocket, or feeding hiccup can compromise an already stressed material. In this case, use high-performance systems, like Bernard® AccuLock™, which offer consistent wire positioning, secure liner locks to reduce burnbacks, and long-life contact tips for fewer changeouts.
Don’t let a $5 part jeopardize a $50,000 asset. Use the best consumables you can for every weld, especially in repairs.
6. Clean Thoroughly between Passes
Interpass cleaning is essential in multipass repair welds. Skipping it can cause inclusions between layers, poor fusion, slag entrapment, or unexpected cracking on cooldown.
Repairing a repair reflects poorly on quality and may even disqualify the part. In oil and gas process piping, the repair becomes a cutout.
Brush, grind, or gouge between passes as needed. The extra effort up front saves massive time and credibility later.
7. Include Preheat and Postweld Heat Treatment if Required
If preheating and postweld heat treatment (PWHT) are specified, they should not be skipped. They’re often more important in repairs than in original fabrication. Preheating prevents hydrogen cracking and reduces hardness gradients, especially in carbon and alloy steels, while PWHT relieves residual stress and restores ductility.
You can check applicable codes (e.g., ASME, AWS, API) or consult an engineer to assess the need.
8. Finish with Inspection and Documentation
Once the arc stops, the work isn’t done. Inspection validates the weld and your repair process. Your weld repair checklist should include the following steps:
- Visual check: Look for undercut, porosity, or surface defects.
- NDE if needed: Perform magnetic particle, ultrasonic, radiographic, or penetrant testing, depending on part service and criticality.
- Final blending: Remove sharp transitions and stress risers.
- Document everything: Record the filler metal used, WPS, parameters, and inspector notes.
Traceability matters, especially for safety-critical applications. Documentation also supports certifications, audits, and future failure analysis.
Final Word
When it comes to repair welding, good enough isn’t good enough; your reputation depends on getting it right.
Whether it’s a crane boom, pressure vessel, or structural column, weld repairs demand more than arc time. By prioritizing planning over guesswork and precision over speed, you can deliver quality weld repairs — restoring the structural integrity, asset reliability, and operational safety your customers are counting on.
This article was written by Mostafa Hanafy (director of strategic marketing and product management at Bernard and Tregakiss) for the American Welding Society.

Community and Events

Weld Wednesday
Our monthly podcast tackles a variety of welding topics for listeners in any position
within the industry.